Pintrest

Follow Me on Pinterest

Monday, December 22, 2014

Chocolate Chip Gingerbread Chickpea Blondies with Maple Glaze

The following recipe is tested and made by my mom-in-law, Debbie, and has been adapted by the popsugar website:)
Don't be afraid of the chickpeas- they only make this recipe more delicious. There's nothing wrong with trying something new!


For these blondies you will need:

  • 1 15oz can of chickpeas
  • 1/2 cup cashew butter
  • 3 tablespoons maple syrup or honey 
  • 2 tablespoons blackstrap molasses 
  • 2 teaspoons ground ginger or 1 teaspoon fresh 
  • 2 teaspoons vanilla extract
  • 2 tablespoons ground flaxseed or chia seeds- (don't have either? almond or cashew meal)
  • 2 teaspoons cinnamon
  • 1/4 teaspoon ground cloves 
  • 1/4 teaspoon ground nutmeg
  • 1/2 teaspoon salt 
  • 1/2 teaspoon baking powder 
  • 1/4 teaspoon baking soda 
  • 1/3 chocolate chips 
  1. Blend all of these ingredients easily into your food processor.
  2. Spread into a greased 8x8 pan. 
  3. Bake in a preheated 350 degree oven for 25-30 minutes. 
  4. Cool the bars before cutting into squares to enjoy. To top with glaze use the following recipe.

Glaze: 

  • 1 tablespoon cashew butter 
  • 2 teaspoons maple syrup or honey  
  • 1 teaspoon coconut oil 
  • 1/4 teaspoon cinnamon 
  • 1/4 teaspoon ground ginger 
  1. Mix together all ingredients in a medium sized mixing bowl. 
  2. Transfer into a Ziploc bag and cut the tip of the bottom and pipe over the cooled blondies. 

Sunday, December 21, 2014

Pumpkin Pie Smoothie

This smoothie tastes a lot like you guessed it- pumpkin pie. It's a nice morning treat with very little sugar (only maple syrup), the smoothie still holds a nice sweetness.

This smoothie consists of:


  • 1/3 cup of canned pumpkin
  • 4 dates (soaked in hot water at least 10 minutes- this will ensure they blend smooth)
  • 1/2 cup plain kiefer (I like Sigg's Icelandic) (Can substitute plain yogurt)
  • 1 tsp vanilla protein powder (I use a whole food powder from vitacost) this could be substituted with a tsp of ground flax seed
  • dash of nutmeg 
  • dash of cinnamon 
  • 1/2 of a frozen banana
  • 1 tablespoon (organic if possible) maple syrup 
Drain water from dates and put all contents in the blender and blend until smooth and enjoy! If the contents are too thick- add more yogurt. 

The Dinner Daily Challenge Part II

The following is a continuation of The Dinner Daily Challenge:

Wednesday night's meal was a southwestern style chili using very simple ingredients. This called for corn, which I skipped and added extra mushrooms- because I am a fan and don't use them enough!

Thursday night featured a crock pot chicken with root veggies. This turned out to be a perfect meal for a cold day that was way too busy to mess with dinner by the end of it! There are two in my family so this gave us plenty of left over chicken to use in salads and sandwiches for later in the weekend. 

 Friday night featured the easiest meal of all to make but for me could have been the most tasteful because I have an unending love for anything pasta.
Friday evening consisted of fresh garlic, baby spinach and tomatoes sauteed and tossed with pasta. I had some roasted red pepper in my fridge that I tossed in too and topped the dish with Parmesan cheese. A true Friday night dish my family could unwind with- Thank you Dinner Daily!
For more information on just what The Dinner Daily can do for your family's weekday meals visit their website (www.thedinnerdaily.com). For more information on how Lettuce Shoppe can  bring the makings of these meals to your home, visit www.lettuceshoppeforyou.com

The Dinner Daily Challenge

Lettuce Shoppe has made efforts with a company called The Dinner Daily (www.thedinnerdaily.com) to collaborate our two businesses. Their idea is for busy families to have accessible, healthy meals at their fingertips in roughly 30 minutes with a meal plan for each day of the week (Monday -Friday) and a grocery list to boot with sale items from grocery stores for a family of four for around $85 at your local grocery- no matter where you shop! They offer a crazy-low price for this service that offers flexibility like veterinarian meals, one for those who don't eat red meat and even one for families of two, which lowers the cost of your groceries buy up to 50%.

We, at Lettuce Shoppe (yours truly, Elizabeth McMullen and Renee Trainor) are featuring this weeks recipes from The Dinner Daily to show just how easy this can be. This list offers plenty of flexibility for substitutions. For example, Liz is not a fan of mushrooms or chunky tomatoes so she can substitute with other veggies. Renee, does gluten free meals so pastas and such are personally substituted with GF pastas or rice.

Follow us this week as we compare side by side our meals from the Dinner Daily highlighting what substitutions we made to suit our families personal preferences.

Monday night features a low carb and high protein Chicken Scramble with tomato and broccoli over a mashed cauliflower.

Renee chose to follow the recipe using ground turkey over chicken.
See our results ...


Tuesday night's dinner appealed to the more classic side of life with a delicious sockeye wild caught salmon (on sale!) topped with garlic and basil and served with roasted broccoli and brown rice. A healthful dinner for sure!
 A nice option with The Dinner Daily is that while they provide you with a complete shopping list, this doesn't have to stop you from adding your own flare to the menu. If it calls for steamed broccoli, certainly roasting it is not against the rules- since there are no rules in cooking. These are merely guidelines for enjoying the ease of not over thinking your weekday meals.

See the next post for Wednesday thru Friday continuation...

Monday, December 15, 2014

"Cookie Dough" Ice Cream

The following recipe is another success of my famous mom-in-law, Debbie. She used chickpeas to simulate cookie dough in this delicious ice cream. You will need an ice cream maker to produce this fine concoction, however, if you do not have one, you may add this "dough" to your favorite purchased ice cream or follow a recipe online for a machine-free ice cream :)
Bon Appetit
xoxo Renee

cookie dough:

  • 1 cup cooked chick peas (remove skins and pat dry- I suppose you could use canned "no salt added beans as well, but this is up to your discretion and taste)
  • 1 teaspoon coconut flour 
  • 1/3 cup almond butter (you could substitute cashew or peanut butter)
  • 1/4 cup honey
  • 1/3 cup mini chocolate chips (or just chop into small pieces regular chunks) 
ice cream : 
  • 2 cups heavy cream 
  • 1 cup half& half 
  • 1 cup full fat coconut milk, well stirred 
  • 3/4 cup sugar
  • 2 teaspoons vanilla 
  • a pinch of salt 
  1. For the dough, puree all the ingredients minus the chocolate chips in a food processor until absolutely smooth. 
  2. Add chocolate chips to the dough and mix. 
  3. Dissolve sugar into half and half over medium heat. Cool. 
  4. After the half and half mixture has chilled, add all ice cream ingredients into ice cream machine and follow manufacturer's instructions to make ice cream. 
  5. While ice cream is mixing in machine, put 1/2 teaspoon  sized balls of cookie dough (using all the dough you've made) on waxed paper over a cooking sheet and place in freezer.
  6. When the ice cream is finished in the machine, transfer to a freezer container and add as many or as few cookie dough bites as you like. Stir loosely and freeze to cure no less than a few hours.


Wednesday, December 10, 2014

Liz (Loves) Lemon Squares

The following lemon squares are made with Liz in mind. She loves lemon!


For the crust:

  • 1 stick of butter
  • 1/4 cup of coconut oil 
  • 2 cups flour (I used 1 1/2 Bob's Red Mill GF blend and 1/2 cup cashew flour) 
  • 1/4 cup brown sugar 
  • 1/4 cup stevia blend 
  • 1/4 cup powdered sugar (also set aside extra for dusting the top if you wish :)
  • dash of salt 
For the lemon goodness on top: 

  • 6 large eggs (farm fresh with those bright yellow yokes will really bring out the pretty yellow color in the squares) 
  • 2 cups sugar (I used a 1/2 cup of stevia here, and the remainder regular organic turbinado) 
  • 1/3 cup flour (again, I used Bob's...)
  • 2 teaspoons grated lemon zest (I like mine extra lemon-y)
  • 1 cup fresh squeezed lemon juice
Making these is a kind of like a 1-2 step. Preheat your oven to 350 degrees. 

Grease a 9x13 pan that has been lined with foil. Using a food processor blend all the ingredients for the crust into it forms a dough. Put the dough into the lined pan and press with your fingers the dough into the full bottom of the pan. 
Put into the preheated oven for 25 min until it starts to lightly brown. 

Meanwhile crack 6 eggs into a medium sized bowl and using a sieve (optional) add sugar and whisk together. Add flour removing sieve continue to whisk. Add zest and lemon juice. 

After removing crust from the oven turn the oven down to 300. Add the lemon mixture onto the crust and return to the oven for 30 minutes or until just done in the center. 

Monday, December 1, 2014

Decadent Molten Lava Chocolate Cake

This recipe is adapted from a Food & Wine magazine. I like that it's chocolate that is the real star of the show for this warm, decadent dessert. I also used a rich chestnut flour from Italy, which has a sweetness to highlight the chocolate- this could be substituted with pastry flour or arrowroot flour- or whatever you have that's very smooth for flour.

To make this you will need:


  • 1 stick of butter 
  • 6 ounces of bittersweet chocolate
  • 2 large eggs
  • 2 egg yolks
  • 1/4 sugar 
  • a pinch of salt 
  • 2 tablespoons chestnut flour, plus more for dusting 
Preheat the oven to 450. 
Using 6 oz ramekins, butter and flour them- tapping out the extra flour. 
Use a double boiler over simmering water to melt the butter. Add in the chocolate and turn with a rubber spatula to mix well. 
In a medium sized bowl, use an electric mixer to beat the eggs and egg yolks with the sugar and salt at a high speed until pale and thickened. 
Continue to turn chocolate with butter until smooth and glossy. Fold the chocolate into the whipped egg mixture along with the flour until just blended. Spoon this batter into the dusted ramekins and set onto a lipped baking sheet. 
Bake for 10 minutes. The sides should be firm like a cake and center- soft. 
Let the cakes cool a minute or two and then use a knife to release the cake around the edges. Place a plate on top of ramekin and turn up side down on plate. Let this sit for several seconds before pulling ramekin off the cake to serve. 
Bon Appetit xoxo Renee 

Monday, November 17, 2014

Chocolate Creme Pie

This is a classic chocolate cream pie, no extreme adaptations here. However, I took some advice from a friend and used coconut milk instead of regular milk for the pudding- adding to the richness of the pie. You will need at least 6 hours to complete this dessert so it's not a great "last minute" dessert.

For the crust:

  • 1 cup crumbled chocolate cookie wafers (I used the Trader Joe's GF "jo'jo's" (cookies) deconstructed- they are gluten free but use what you like) 
  • 1/3 cup almond meal flour
  • 5 tablespoons butter (unsalted) 
  • 1 tablespoon sugar 


For the pudding filling:

  • 2/3 cup organic white sugar 
  • 1/4 cup arrow root powder 
  • dash of salt 
  • 4 egg yolks
  • 3 cups of coconut milk (I like the Trader Joe's brand because it's thick, creamy and has no preservatives) 
  • 6 oz of dark chocolate 
  • 2 oz of unsweetened chocolate 
  • 2 tablespoons butter (unsalted) 
  • 1 teaspoon vanilla 


For the whipped topping:

  • 1 pint heavy whipping cream 
  • 1 tablespoon coconut sugar
  • dash cinnamon 
For the crust preheat the oven to 350 and place rack in the middle of the oven. Use a food processor to blend together the almond flour and chocolate cookie wafers only (no cream center). Feel free to add a dash of salt with the sugar and then add cube at a time of cold butter until it forms a ball. Press the crust into the bottom of a 9" pie pan and bake for 15 minutes. Cool and set aside in the refrigerator until it is again, ready to use. 

Use a heavy sauce pan to combine the yolks, salt, sugar and arrow root powder with a whisk over medium heat. Add the coconut milk and bring to a boil while continuing to whisk until it thickens into a nearly pudding consistency. Take off the heat and let stand. In a large glass or metal bowl put all chocolate (broken into pieces) and butter in the bowl. With a mesh sieve over the glass or metal bowl of chocolate strain the pudding mixture onto the chocolate while still hot to melt the chocolate and butter. Whisk or scrape with a spatula until the pudding is smooth. Cover and refrigerate for two hours. 

Uncover pudding and pour into pie crust and refrigerate for another 4-6 hours. 
Use an electric mixer to whip the cream and sugar until nearly stiff. Top the pudding pie and sprinkle with cinnamon. 
Bon Appetit. xoxo Renee 

Wednesday, November 5, 2014

Southern Style Hummingbird Cake

Happy Anniversary Angie & Rhett! I made this cake for my good friends Angie and Rhett. Hummingbird cake has the the sweetness of the banana and coconut and even though it's layered with cream cheese frosting it retains the lightness of well...a hummingbird. It's officially the ambrosia of the cake world and if you are a banana bread fan- it's your epitome of decadent by comparison.

To make this cake you will need:


  • 3 cups flour (which ever kind of four you like for cake baking)
  • 1 teaspoon baking soda 
  • dash of salt
  • 1 3/4 cup sugar (I like the organic Florida crystals) 
  • 1 teaspoon cinnamon 
  • 1/2 teaspoon nutmeg 
  • 1/2 teaspoon ginger 
  • 3 eggs 
  • 1 cup coconut oil 
  • 8 oz undrained crushed pineapple 
  • 3 ripe to overripe bananas
  • teaspoon vanilla or almond extract (either would work in this cake) 
  • 1 1/2 cup pecans (optional) (divided half for cake, half for top) (you could also substitute with raw hazelnuts) 
Frosting:

  • 1 1/2 sticks of sweet cream butter, softened 
  • 12 oz (1 1/2 packages) cream cheese (I often substitute a neufchatel cheese found in the same area of your grocery store)
  • 2 cups of powdered sugar (you could use less to make less sweet) 
  • 1 teaspoon vanilla extract 
Preheat oven to 350. 
In a large bowl combine the first 7 ingredients with a large fork or spatula - you don't want this cake to be done with a an electric mixer. Add eggs an oil stirring gently and vanilla. Fold in remaining ingredients to mix thoroughly.  

Pour batter into 3 greased and floured 9 inch round baking pans. To cook the three evenly you can place the racks at 1/3 and 2/3 of the oven and switch the cakes spots halfway through cooking. However, if you can fit all three in the center, that's great (or bake in batches). Bake at 25-30 minutes on 350. 

Cool on rack and chill in fridge or at least two hours before frosting. Dust top with cinnamon and remaining pecans- I skipped the pecans altogether this time in lieu of edible flowers. 

To make the cream cheese frosting beat the cream cheese and butter softened in an electric mixer slowly adding powdered sugar and finally vanilla extract. 

Frost your cake and Bon Appetit!
-Renee

Monday, November 3, 2014

Peanut Butter "NOM-NOMS"

There is a great website that delivers snacks to your door. My mother in law got my husband and I as an anniversary gift a delivery every month for a year!! Very generous. This company makes a few flavors of what they refer to as "nom noms". Little two bite "cookies" that are fairly healthy for snacking. They come maybe 5 to a pack. I have developed a recipe using super few ingredients to emulate the nom nom. These are peanut butter ones but if I get an overwhelming response I can make different varieties as well.


To make these you will need:


  • 1/2 jar of your favorite peanut butter (or 8 oz) (I used a variety with unblanched pb for extra nuttiness) 
  • 2 eggs 
  • 2 cups oats (I used Gluten Free, but use what you like- you could even use something like Rice Krispies or a flaked cereal if you like) \
  • 3/4 cup coconut sugar 
  • 1/2 teaspoon of baking soda 

Preheat oven to 350.
Here is the fun part: put all ingredients in a bowl and mix the heck out of it until the peanut butter has thoroughly coated everything. Use an ice-cream scoop to create a small fist-sized cookie. Don't worry about flattening them or anything, they survive. Bake for 15 min on 350. Makes about 8 large nom noms.
Bon appetit with your new favorite mid morning coffee snack ;)

Sweet Potato Panna Cotta With Cranberry Sauce

Another delicious creation from my favorite (and only) mom-n-law. Debbie has once again treated us with this fabulous fall treat- Sweet potato panna cotta. Think of it as a cross between pumpkin (or sweet potato) pie and flan- but maybe better...
(Serve with homemade cranberry sauce (see recipe below))


To make this recipe you will need:


  • one med/large baked sweet potato
  • 1 1/2 whole milk (she used full fat coconut)
  • 1 1/2 heavy cream 
  • 1/2 cup coconut palm sugar
  • 1/2 organic sugar (Florida Crystals are great) 
  • 3/4 cinnamon
  • 1/4 nutmeg
  • pinch of clove
  • 5 teaspoon gelatin (or two packets) 
Mash the sweet potato out of it's skin and add to blender. Add the next 7 ingredients and puree until smooth. Use a rubber spatula to scrape ingredients into a saucepan. Sprinkle gelatin on top and let soften for ten minutes. Bring to a simmer. Continue simmering for an additional ten minutes. Pour into 4 - 6 oz ramekins and place in refrigerator for at least two hours to set.  
Set ramekins in warm water (halfway up ramekin) to un-mold. 
Put cranberry sauce on plate and place panna cotta (face down out of ramekin) in center of plate. Top with a dollop of whipped cream and serve. 
Yummy!!


Cranberry Sauce: 
  • 2 cups water
  • 1 cup cranberries
  • 1/2 cup honey
Place all ingredients in a saucepan and simmer until the cranberries start to "pop". Let cool slightly and blend with an immersion blender until smooth.  Serve chilled or hot. 

Shepherds Pie

Shepherds pie is a true comfort food! With the colder weather coming it is so yummy to have along side a nice glass of wine!

Ingredients:

For the potatoes:
-2 russet potatoes
-2 sweet potatoes
-3 cloves of garlic
-2 tablespoons of butter
-2 tablespoons (I usually eye it) of milk
-1 egg yolk
-salt and pepper to taste

For the filling:
1lb of ground lamb
2 links of hot Italian sausage (take casings off and ground)
1 tsp of olive oil
1 medium onion, diced
2 cloves of garlic, diced
2 carrots, chopped
1 cup of frozen corn (or 1/2 cup of frozen corn and a 1/2 cup of frozen peas)
1 celery stalk, chopped (optional)
1 parsnip, diced (optional)
1 cup of chicken broth
2 tsp tomato paste
1 tsp of Worcestershire sauce
1 tsp of freshly chopped rosemary
salt and pepper to taste
paprika to sprinkle on top

Directions:
Peel and cut potatoes into small chunks and place in a large pot. Pour cold water onto to cover potatoes. Add 3 whole garlic cloves and salt into pot. Bring to a boil, and allow it to boil until the potatoes are soft enough for a fork to easily go thru.) Drain, then mash the potatoes and garlic really well. Add in remaining ingredients and mash together well.

Preheat oven to 400 degrees.
In a large skillet, heat the olive oil and saute the onions. Add the lamb and sausage and allow to fully cook. Add the carrots, celery, parsnip, garlic, salt and pepper. Saute for 1 minute. Add the chicken broth, Worcestershire sauce, and tomato sauce. Reduce heat and simmer for 10 minutes. Stir in the frozen corn and fresh rosemary.
Spread meat mixture evenly in the bottom of a 11x7 glass baking pan. Spread the potatoes evenly on top starting with the edging and working way into the middle using a rubber spatula. Sprinkle paprika on top. Bake for 25 minutes in the oven.

Enjoy!

Wednesday, October 29, 2014

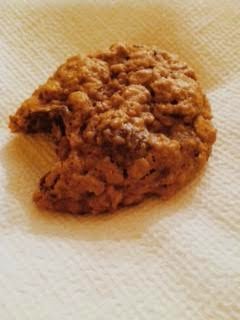
Gluten Free Oatmeal Chocolate Chip Cookies

Suffice to say some cookies have a more "healthy" taste than others. I tend to associate this with an oatmeal cookie. There is no sound basis for this I am sure. Although Oatmeal Raisin is King as far as I am concerned, every once and a while you just got to have chocolate. These are a good weekday snack that won't have you sad you had a few calories and yet won't blow your "weekend diet" if you are once of those people.

To make these cookies you will need:


  • 2 cups gluten free oatmeal (I like the Trader Joe's house brand) 
  • 1 cup sorghum flour 
  • 1 teaspoon baking soda
  • 1 teaspoon baking powder
  • dash of salt
  • 3/4-1 cup quality chocolate chips (I happen to love the Ghiradhelli 60% chocolate, just enough) 
  • 2 eggs 
  • 1/2 fat- by fat, I mean you can use whatever you please oil, butter, yada, yada I used half butter and half coconut oil 
  • 3/4 coconut sugar (these are not sweet, sweet cookies- if you are looking for something on the sweeter side just add more sugar- not a crime.)
  • 1 teaspoon almond extract
  • parchment paper
Preheat your oven to 350. 

Combine your dry ingredients and set aside. 
Blend fat and sugar with your mixer. Add eggs and extract. Combine dry with wet for one minute on medium with mixer. Add in your chocolate chips by folding them in with a spatula. Place on parchment paper on top of your cookie sheet and bake for 12-13 minutes. This will produce around 18 cookies. Probably two batches. Let cookies cool on rack for three to five minutes. Bon Appetit. 
xoxo Renee 

Tuesday, October 21, 2014

Sweet Potato Pizza Crust

 You may have gathered that I am always looking for a tasty option for gluten free pizza crust. If you and pay double with a pained tummy?
have opted for a gluten free crust at your local pizza place you may have this option which seems all the rage but frankly has you chewing twice as hard and long with a sore jaw and a stomach in knots just as much as your typical delicious wheat crust. So why pay more
Don't! You may have noticed I featured a cauliflower crust a few weeks ago on this very blog. I stand by that recipe as a favorite for gf option- it has a nice consistency and flavor. However, I won't be shy to admit it is work to make and on a weekday evening when all you have is a half hour as luxury time to make dinner- this sweet potato crust is easy enough to make- almost too easy.
You can add any toppings you like- you could even make this sauce free and add brie with fresh pears and sage or perhaps apples and caramelized onions playing with the sweetness of the potato. Or you could add robust sauce and toppings to offset the sweet. I happened to use a sauce with pepper and eggplant in it because I had it on hand and like any make-at-home pizza just be creative.

Sweet potato crust:


  • 3 small/medium sweet potato 
  • 1 cup flour of choice (I used sorghum by Bob's Red Mill- you can use almond or other) 
  • 1/2 teaspoon oregano
  • 1/2 teaspoon garlic powder
  • 1 teaspoon baking soda 
  • 1/4 teaspoon xantham gum (optional) 
  • dash of salt 
  • olive oil drizzle (optional)  
I have seen recipes using sweet potatoes boiled, drained and mashed - however save yourself some time. If you are home through the day bake the potatoes at some point (an hour on 400) OR throw them in a crock pot on low for 5 hours- the inside will slip out of the skin. 
The benefit? The flavor and vitamin richness of this potato will not be boiled away. So, to begin, peel three cooked sweet potatoes and put into a measuring cup to mash- this should be around 1 cup. 
In a medium sized bowl add the remainder of ingredients minus olive oil. 
Add the sweet potato and use your hands or the bottom of a spoon to form a ball of dough. Using parchment paper on a pizza pan or cookie sheet- what-have-you put the dough on top and press into a round crust using your hands and if you need extra flour so your fingers don't stick to the dough. You can drizzle the top with a little olive oil and bake for 15-20 minutes. 
Then top with a sauce and cheese with select toppings to create your sweet potato pizza! 
Cook off for another 5-7 minutes. 
Bon Appetit
xoxo Renee 

Monday, October 20, 2014

Brown Butter, Bourbon Pecan Pie

In all my memory of growing up baking pies with my mother, the amount of fruit and creme pies seemed endless. I know, they showed up on the scene at some point but I don't remember once baking a pecan pie. So to jog my memory of something perhaps never actually attempted here is a lovely pecan pie. I had guests for dinner and not a slice survived (and there were more slices than people...)

For the crust

  • 1 cup oat flour
  • 1 cup cashew flour 
  • 1/2 teaspoon of salt 
  • 2 tablespoons butter 
  • 1 egg


For the Filling:

  • 1 stick (1/2 cup) butter 
  • 3 eggs
  • 1 cup dark brown sugar 
  • 1/2 maple syrup 
  • 1/2 cup brown rice syrup (this is a nice substitute to the traditional; use of corn syrup- I like the Lundberg brand with the "Sweet Dreams" label) 
  • 1 shot bourbon (this is 2 tablespoons but you could even use a shot and a half if you wish) 
  • 1 tablespoon vanilla 
  • 1/2 teaspoon of cinnamon 
  • dash of nutmeg 
  • 2 cups chopped pecans 
For the crust, add all contents into your food processor and pulse until it forms a ball. Press into the bottom of your pie plate and place in freezer or refrigerator while you make the filling. 

Preheat the oven to 425. Place a rack in the 1/3rd up from the bottom of your oven. (In other words- just lower than halfway.) Place your stick of butter in a small sauce pan over medium heat. Let is foam and bubble until it browns, stirring it often. This should take around 7 minutes- you will get nervous when the color goes from a liquid yellow to a foam but let it do its thing. Remove from the heat when it browns. In a larger metal or glass bowl transfer the butter into, then add eggs, brown sugar, maple, brown rice syrup, bourbon and vanilla. Whisk these items together. Add cinnamon and nutmeg as well as pecans. Use a spatula to scrap contents of the bowl into your cooled crust. 
Bake the pie at 425 for 10 minutes before reducing the temperature to 375 and continue baking for 40 minutes. Let cool on a wire rack at least an hour before placing in the fridge over night or a few hours (3 or so) to set. 

Wednesday, October 8, 2014

Date Three Ways

This recipe is literally a dream recipe from Debbie Kolares, my mom in law. She dreamed about making this- a recipe of her own creation- and then made it!!

Crust:

  • 1cup almond flour
  • 1cup chestnut flour ( u may substitute coconut flour )
  • 1/2 cup arrowroot flour
  • Pinch salt
  • 1cup butter
  • 1 egg
  • 1 tbsp white or apple cider vinegar
  • Scant 1/4 cup water
Filling:
  • 3 cups chopped dates
  • 1/4 cup honey or coconut sugar
  • 1/2 teaspoon cardamom
  • 3/4 cup water ( I used fresh dates, if u use dried, increase water )
Toppings:
  • 6oz fresh goat cheese
  Options
  1.      6 slices prosciutto toasted in oven till crispy
  2.     Toasted pine nuts
  3.     Confectioners sugar
For the crust: pulse flours and salt in food processor. Add butter in pieces. Process until it resembles sand.  Add egg, vinegar and water pulse till forms a dough. Chill.
Divide into 6 balls, flatten each one into 5 inch disc pinch edges into a raised edge.

Preheat oven to 375. 
For the filling:  place all ingredients into a saucepan and cook on medium heat till dates disintegrate and filling is thickened. Cool.

To assemble:  spread about 3 tbsp of filling o each disc. Bake at 375 for 15-20 mins or until edges start to brown. Remove from oven and evenly divide crumbled goat cheese over top. Return to oven till cheese melts. (7 or 8 minutes)

   For savory option : top with crumbled prosciutto. (This is good for an appetizer or part of a tapas menu.)

     For sweet option #1: after goat cheese melts top with toasted pine nuts, pinch ground cardamom and a drizzle of honey.

     For sweet option #2:  after cheese melts, sift confectioners sugar and cinnamon over top.

Wild Peach Coffee Cake

This is one of those recipes that you can cheat your way through real breakfast for yummy "cake".  It's has a moist and slightly drier cake-y element that mimic a scone pie or something. I add in a touch of raw almond butter and honey for depth.
The peaches I used were straight from Liz's backyard, small, lightly sweet and moist. Not super tart so I would recommend a good white peach as a substitute.

Here is what you will need:


  • 2 cups heaping of diced peaches 
  • 2 cups flour (I used a mixture of coconut, sorghum and arrowroot but plain old flour does the trick) 
  • 1 stick (1/4 cup) butter, softened 
  • 1 1/4 cup sugar (divide this- one cup will be used in the batter and 1/4 will be reserved to sprinkle on top with cinnamon - I like the raw sugar for a crunchy textural effect
  • 1/2 tsp of cinnamon 
  • 1 cup plain Greek yogurt (I use Brown Cow brand) 
  • 1 tsp vanilla 
  • 2 eggs (try to have these room temp) 
  • 1/2 tsp salt (I like Himalayan pink coarse salt)  
  • 1 tsp baking powder 
  • 1 tsp baking soda 
  • 1/4 almond butter, raw 
  • 1/4 cup honey (use the local stuff, it's worth it) 
  • 1 tsp fig balsamic vinegar syrup (this is a specialty item and is OPTIONAL
Now that we have a host of ingredients, let's put this all together shall we? 

Preheat your oven to 350. Set aside the dry stuff- flour, baking powder and soda as well as salt in a small bowl. Done. 

Next, cream your butter and one cup of the sugar in your electric mixer. You probably want the paddle attachment to mix this is you have a Kitchaid or what-have-you.  While creaming you can put aside a small bowl the 1/4 cup remaining sugar with cinnamon. If you would like you can portion out your almond butter and honey in the same area of the kitchen since you will use these items at the same time. Also, use the paper from your butter to grease a 9x13 glass pan. 

Add the balsamic to the butter and sugar mixture, this gives an element of taste you can barely detect but is delicious- whip this til smooth on med-high. Add in the eggs and set to med/ med-low, then yogurt and vanilla. Add in the flour mixture and beat just to mix. 

Take half (or a little more) of your "dough" and spread with a spatula into your glass baking dish. It will be a little sticky, Then layer in half (or a little more) of your peaches along with half of your cinnamon/ sugar mixture. Put the remaining portion of the dough on top of your first 'layer' -you can do this in globs if need be- don't go smooshing all those gorgeous peaches into the bottom half- be gentle! Put the remaining peaches on top accompanied by drizzles of raw almond butter and honey. Top with the remainder of cinnamon and sugar mixture and bake (middle rack in oven) for 45 minutes. 

Monday, September 22, 2014

Squash-Squash Pasta Sauce (Acorn and Zucchini dressed pasta)

This dish uses squash two ways- an acorn squash made into a sauce and zucchini tossed into the pasta to make a flavorful fall dish.  To make this dish you will need:


  • one small acorn squash 
  • one medium zucchini
  • 1/2 a vidalia onion, minced 
  • 12 oz pasta, uncooked (let's say three quarters of a box of uncooked spaghetti, I like Ronzoni GF- it's a nice blend) 
  • 2-4 tablespoons olive oil (half for one squash, half for the other)
  • 1/2 teaspoon cayenne pepper 
  • 1/2 teaspoon cinnamon
  • 1/4- 1/3 cup heavy cream 
  • 1/4 cup shaved romano cheese 
  • 1/4 teaspoon crackled black peppercorn
  • fresh basil (optional)  
  • salt to taste 
Preheat your oven to 400. 

Quarter your washed acorn squash and clean out the center of the seeds and strings. Clean the seeds out of the strings and discard the stringy center only, keep the seeds. Use a glass roasting pan or like I choose, a cast iron pan to add the acorn quarters (flesh side up) and seeds in the center. Drizzle both with olive oil, the seeds with salt and the squash with cinnamon and cayenne. Place in the oven for 40 min. 

Meanwhile, when the acorn has been in the oven for about a thirty minutes, take this time to mince the onion and slice your zucchini in rounds extra thin. Put a pot of water, nicely salted to boil. 

When your acorn has cooked through, take your squash out to cool slightly. Add your pasta to boiling water and place a wide shallow pan (big enough to eventually fit pasta and sauce) on med high with olive oil. Add in zucchini and onion and saute with light salt. When these just start to caramelize, turn to low. 

Timing is key to this, your pasta should still be cooking. Set seeds aside and scoop squash from acorn shell into your food processor. Add cream and romano with pepper- more cinnamon if you would like- blend to a thick sauce. Pour right on top of your zucchini and add in about two ladles full of pasta water just before draining your pasta. This will thin out the sauce and give it body all at the same time. 

Drain your pasta and add right away to the "squash-squash"  sauce. Toss and top with acorn squash roasted seeds and fresh basil (optional).
Bon Appetit
xoxo Renee

Sunday, September 21, 2014

Peach Tart with Buttery Crust

The following recipe is provided to us from Renee's mom-in-law Debbie Kolaris. She is probably responsible for more recipes here than you know- but this is the first accredited recipe. Everything she makes turns to gold so you will love this recipe!!


Crust

  • 1 cup each almond and coconut flour
  • 1/2 cup arrowroot flour pinch salt. 
  • 2 sticks of butter, cold
  • 1 egg 
  • 1/4 tsp apple cider vinegar 
  • 1/8-1/4 cup very cold water
  • parchment paper
____________________________________________

Filling:


  • 1/4 cup butter
  • 1/3 cup coconut palm sugar
  • 4-5 peaches, peeled and sliced
  • 1 tbsp arrowroot


Preheat oven 375.

Pulse all flours in food processor add sticks cold butter  process to crumbly appearance. Add egg, cider vinegar and pulse. Add cold water pulse till it forms a dough. Divide in half  you will only use 1/2 of it.  Roll to 12" circle between 2 sheets of parchment.


  Melt 1/4 cup butter in pan. Add 1/3 cup coconut palm sugar. Add 4 or 5 peaches- peeled and sliced. Cook until sugar is bubbly and peaches have given up some of their juice.  Add arrowroot and stir. Cool, arrange peach slices over crust along with thickened syrup. Fold edges of crust up so syrup won't run bake 375 for 20 minutes or until edges brown. 

Serve with ice cream (or) lavender infused whipped cream. 
If served with ice cream use the following recipe to make a caramel sauce: 

  • 1/4 cup butter 
  • 1/4 cup coconut palm sugar. 
  • 1/4 cup heavy cream 
Cook butter and palm sugar until bubbly. Add heavy cream. Return to bubbling.  Remove from heat. Enjoy!

Monday, September 15, 2014

Cauliflower Crust Pizza

Most of us like veggies on top of our pizza but are you brave enough to make your pizza crust out of veggies? This cauliflower crust if done right is not only delicious but healthful. It's work, I'm not going to lie but it's worth it. Just try it!
To make this crust

You will need:


  • one large head of cauliflower 
  • 1/2 cup sharp cheddar, parm or romano- a drier, saltier cheese (whatever you choose- mix it up) 
  • 2 eggs 
  • 1/2 cup flour (I used almond flour- you can even use bread crumbs if desired) 
  • 1 tablespoon of dried oregano 
  • 1/4 teaspoon red pepper flakes 
  • 2 tablespoons of olive oil
  • 1 1/2 teaspoon garlic powder 
  • 1/2  yard or so of cheese cloth- or a thin- woven kitchen towel 
This is a several step process. Yay! So take it one step at a time and it'll come out great! I'm leaving the sauce, cheese and topping ideas up to you- everyone has their favorites or likes to change it up so feel free.


Preheat oven to 455.

First, pull apart the washed florets off the cauliflower itself. In as many steps as it takes with your food processor, put in about 3-4 florets at a time to pulse into rice-sized pieces of cauliflower. (Hint: this is also a great substitute for rice if you steam it! Transfer all this pulverized cauliflower into a microwave safe bowl.

Second, cover with a paper towel and microwave for three-four min. I wish there was a better way with this- I am not "pro microwave" at all, but steaming the vegetable first would put way too much moisture in something that is going to be stripped of it's rich water content anyway. After you "zap" the cauliflower, let it stand for a minute. Take this time to take out your other ingredients and clean the counters of your cauliflower bits left over.

Third, fold over your cheese cloth twice and put in a handful of the warm cauliflower mixture inside your palm (holding the cloth) & over the sink ring out excess moisture- ALL OF IT- you aren't doing yourself favors by leaving some. Transfer into another med/large bowl and continue the process until all of your cauliflower is rung out thoroughly.

Fourth, add in all remaining ingredients- spices first. Mix the dough with your hands. If it appears dry you can add a little extra olive oil. Using a well oiled stone or pizza pan with parchment paper spread the dough out into a round or square pie. Bake in the oven for 15 min or until it starts to brown. Reduce the oven to 425. Take your pie crust out, add toppings and continue to melt your toppings for another 10 min or so.
Bon Appetit
xoxo Renee

Sunday, September 14, 2014

Cold Pea & Mint Salad with Goat Cheese

This is a refreshing salad that can be enjoyed all year long. Yes, fresh peas are in season in Spring, but you can use fresh or frozen blanched all year long. The mint makes an impact on how refreshing this salad really is. It goes nice with a protein like a steak or duck breast.

To make this salad you will need:

  • 2 1/2 cup peas, blanched
  • 20 mint leaves, julienned 
  • 1/3 cup crumbled goat cheese (just classic plain goat cheese) 
  • 3 tablespoons olive oil 
  • 2 tablespoons white balsamic (you could also use rice or white wine vinegar) 
  • 1 teaspoon hickory smoked salt 
  • cracked pepper to taste 
This comes together is ten minutes I promise. 
Blanch those peas by boiling water and placing the peas into the boiling water for two minutes tops. Drain under cool water. Set aside. 
Whisk together the oil, vinegar, salt and pepper to a near emulsion. Add peas and mint. Toss and add goat cheese. Ta-dah! Done and delicious! 
Bon Appetit 
xoxo Renee

ABC Asian Style Noodle Soup (Part C of How to use a Whole Chicken)

Welcome to the third installation of ABC How to use a Whole Chicken . This is Part C, Asian Noodle soup. This Asian soup doesn't favor any area of Asia, but it does have Siracha. Yum!! It's perfect comfort on a cold night when you are just too lazy to even call for take out. This recipe is enough for two, but you could cut in half or double easily.


You will need:

  • 4 cloves of garlic 
  • 8 crimini or baby bella mushrooms, brushed clean with a wet paper towel
  • small bunch of green onions-scallions (maybe 5) 
  • just under 1/2 a package of Thai or Vietnamese rice noodles medium width (this sounds fancy but you can get these at any Asian food store or now, even your local grocery- they are clear looking and the Vietnamese ones often have the word "pho" on them, 16 oz per package.
  • 2 teaspoons Siracha hot sauce (the classic with the roaster on the front)
  • 2 teaspoons soy sauce (I like San-J, it's GF) 
  • 6 cups chicken stock (hopefully homemade from "Recipe B" 
  • 1 tablespoon olive oil 
Wow, those ingredients look so convoluted huh? Trust me, to make is so easy and takes ten minutes!

First, mince your garlic and slice your mushrooms. Cut your scallions right down to the green, they will cook in with the soup. 
Put a medium sized pot on the stove and heat oil on med- low so as not to burn the garlic. Add garlic and let cook down. Add the mushroom and scallion and put on med temp. Add in soy sauce and siracha and stir. Cook these down for about two minutes. 
Add in the broth and put on high. When it comes to a boil, stir in noodles and cook for about five minutes to soften the noodles. Return to med-low temp to let your soup settle. Check the noodles to make sure they are cooked thru. Feel free to add more hot sauce or soy to salt or spice your soup. Grab a bowl and some chop sticks and enjoy the garlicky goodness. 
Bon Appetit. 
xoxo Renee

ABC Make Your Own Chicken Stock (Part B of How to use a Whole Chicken)

This is recipe B in an ABC How to use a Whole Chicken

All too often we end up using a recipe calling for chicken stock.
All too often we end up throwing out the valuable remains of a chicken dinner.
Can't there be a meeting of the minds on this matter? Some people feel like this seems like a lot work- I mean you just polished off a chicken... but it's actually very simple and other than the chicken carcass itself and water requires no "recipe". If you worry you will not use the stock within a week of making just throw it in the freezer for easy access next time you do have a recipe that calls for stock.

This is going to be a loose recipe so there's no failing but you will need the following:

  • one chicken  (maybe one that was sold as 4-5 lb with meat on it) minus the meat (if you don't want to get down and dirty with cleaning the bird of every last inch of meat- don't worry- you are leaving on flavor especially if there is skin left) 
  • 8-10 cups water (you can eye-ball this, enough to cover what is in your pot)
  • one onion, any kind, peeled and halved
  • a deep pot
  • a sieve or something to strain the bones and veggies out
  • generous salt & pepper 
Now, this is the bare minimum of what you will need to get a basic stock. I recommend scouring your kitchen your what else will add depth of flavor. Remember, everything gets strained out but you want your soups and other recipes to taste amazing- and they will. 

Also try adding: 
  • 1 or 2 scrubbed and halved carrots
  • whole sprigs of thyme, rosemary, sage, parsley 
  • cumin or cayenne pepper 
  • juice of one lemon 
  • celery or fennel 
  • garlic cloves 
  • other spices 
After picking through the remains of your chicken, go ahead and add it to your pot. Add in the onion and any herbs, veggies or spices you wish. Fill the pot with water just to cover. Add in salt and pepper and put on high. I do this is break down the bones and fat still on the chicken. After this has reached a boil you can reduce to a simmer and let cook for 45 minutes or so. You could leave it for longer but that's up to you. Taste the broth to see if it's to your liking. Add spice or salt if necessary. Turn off heat and let stand 20 minutes or so. Using a large glass container or another pot that will store the broth- put strainer right atop this empty storage container. Using caution because it will still be warm, pour slowly through the sieve until all broth is in and all solids are in strainer. Let stand another 20 minutes or so until putting in fridge overnight and then using or storing in freezer. *

*Tip: I know I said this way easy and you may think it seems time consuming, but my tip is that I do this at night. Either the day I've even the chicken or the day after. While I'm getting things done around the house, reading or watching TV- I get this started and pause what I am doing to handle each little step. It really is easy and the reward is great!

ABC Curried Chicken Salad (Part A of How to use a Whole Chicken)

This recipe is part A in a ABC series on how to use a whole chicken. If you want to get technical I suppose I could have started with how to roast a chicken but that is in here somewhere so let's pretend you've roasted one yourself (or picked up a prepared one from your local grocery) and you want to make the most use of it...
We are going examine three recipes in this ABC series

  1. Curried Chicken Salad (from a prepared chicken) 
  2. Chicken Stock (using the remains of a chicken) 
  3. Asian Style Noodle Soup (putting your stock to good use) 
To make this recipe you will need: 
  • a whole chicken (around 4-5 lb), cooked & chilled 
  • 1/2 cup plain Greek yogurt (I like the Wallaby organic) 
  • 1/4 mayonnaise 
  • 1 heaping tablespoon of yellow curry 
  • salt to taste 
  • 15 fresh chives, minced 
  • 2 cups baby spinach, washed and dried (this is optional- you may like your chicken salad on bread) 
Peel back the skin off the top and bottom. Don't throw this away if you are planning to go on to "Recipe B". Take off the drumsticks and keep for a nice snack. Tear off the wings and save. Using the breast meat by pulling off both breasts and what is left to pick off the bird below, chop the later pieces into cubes. Nothing will be uniform size. 
Put into a medium sized bowl and add mayo, yogurt and curry as well as a dash of salt. Mix thoroughly. If you like a heavier curry flavor feel free to add more. Scoop onto bed of baby spinach and top with fresh minced chives. The color of the yellow against the spinach and chives makes this dish really lovely. If you are ready, move on to "Recipe B"! Bon Appetit
xoxo Renee 

Monday, September 8, 2014

Chocolate Zucchini Cake

This is a really nice semi-sweet cake. It's great when you have some extra zucchini in the garden (maybe those extra large ones no one likes to cook) or just want something not sugary but a treat. Kids will eat it and it's moist as anything. To make this chocolate zucchini cake you will need:

  • 2 1/4 flour (I used 1 cup coconut flour, 1 cup sorghum and 1/4 cashew with a pinch of xantham gum to bind it all together. 
  • 3/4 cup cocoa (unsweetened, of course)
  • 1 teaspoon baking soda 
  • dash of salt 
  • 2 cups hand-shredded zucchini 
  • 1 stick good quality butter, softened 
  • 1 cup sugar (I used 1/4 stevia and 3/4 coconut sugar- this is low-glycemic) *
  • 1 teaspoon vanilla  
  • 2 eggs (organic, if possible) 
  • 1/2 plain greek yogurt (you could substitute this with mayo or oil but I figure the butter has enough calories- this is purely for moisture) 
  • 1/2 buttermilk (I like Kate's) 
  • 1 cup chocolate chips (I like Ghiradelli  60%) 
*Also, if you like sweet, use more sugar. I don't judge- it'll probably be delicious sweeter. 

First- Preheat your oven to 325 and grease a bundt or 9x13 pan. A little trick I like to use: once my butter has softened, use the wrapper to grease your pan. Saves the extra that sticks to the wrapper and butters the pan nicely. 
Second- Set aside your grated zucchini and chocolate chips after measured out, they will be last. 
Third- Sift the flour together with other dry ingredients including salt and put to the side. 
Fourth- Cream your butter and sugar in a stand mixture on medium then add eggs and vanilla. Add in yogurt.
Fifth- Add in half your flour mixture and continue to blend. Add buttermilk and remainder of flour- blend thoroughly. 
Sixth- Take a spatula and mix in the zucchini by hand and then chocolate chips. 
Finally, you can put the mixture into the greased baking bundt or pan and bake for 55 min or until cooked thru. Top with powdered sugar, frosting or nothing/anything if you please.
Bon Appetit. 
xoxo Renee 

Sunday, September 7, 2014

Grilled Salad with Blistered Cherry Tomatoes and Goat Cheese

This is an excellent side dish to some protein or even a grain or pasta. It has the crunch of salad and the satisfying warmth one wants with dinner or a sit-in lunch.  This serves 2 but you can go ahead and double or triple the recipe.

You will need:

  • one washed and dried small head of romaine (cut in halve, lengthwise) 
  • ten cherry (or  grape ) tomatoes 
  • one third of a small red onion, minced 
  • one small handful fresh parsley 
  • 2 oz goat cheese 
  • olive oil (no limit, just eyeball the amount to your own taste) 
  • one fourth cup good balsamic vinegar 
  • salt & pepper to taste 
After letting your washed lettuce dry and cut lengthwise, discard the very bottom of the head. Get out your grill pan on the stove-top and heat to med-high. You can you a frying pan too- whatever you have. Drizzle the inside of the head of romaine itself with olive oil and place on the heat for just about three minutes. You want it to wilt, you can even char it if that is the way you like it. To char leave it on longer. Take the lettuce off the heat and place upward (cooked side up) on a plate. It will cool just a touch. Add in your minced red onion to the hot pan. You can add more olive dry if your pan is dry to saute the onion. Meanwhile halve your tomatoes. Add to your pan the balsamic to finish off the onion and then add tomatoes to heat them just enough to blister on high. 
Turn off the heat. At this point your tomatoes should have blistered, onions cooked and balsamic reduced down. Chop your pasley and place it directly on top of the romaine with salt and pepper. Add the onion and tomato mixture- drizzling any extra balsamic over it you like. Add the goat cheese in clumps. These will melt in just a touch. Done and done, bon appetit. 
xoxo Renee

French Scrambled Eggs

If you are an egg lover like me you may enjoy eggs cooked in a variety of ways- or maybe you think you have the absolute perfect technique that never let's you down. An egg for every occasion for me, but on lazy Sunday mornings, I take the time to slow cook french-style eggs. So easy, but needs a little patience.
You have a choice when it comes to making this eggs. If you want to do it the classic french style pull out your double boiler and get ready! If you want to skip the fuss, take out your favorite pan for scrambling eggs and set on low. If you have a range that dictates the temp from 1-10 -I'm talking 4 at the highest, I prefer lower.

You will also need:

  • 1-2 tablespoons butter (this is a personal choice on how much you want to add)
  • 4 large eggs (farm fresh and organic are best)
  • salt, to taste
  • 1 tablespoon of heavy cream (optional) 
You could add tarragon, chives or what-have-you but honestly what is really called for is the egg and butter with a dash of salt. So simple, so pure. The slow cooking of these eggs ensures that they taste like buttery, soft pillows of egg- so good. 
Heat your pan on low. Add cold butter and let melt. Meanwhile, beat the eggs (which have been out to room temp) vigorously. Add salt and optional cream. Put into pan or double boiler while whisking. 
With a spatula slowly move eggs around until cooked through. This could take several minutes. These eggs should be bright yellow and just the right amount of fluff- yet have a density of buttery, slow cooked egg. They should look wet- not dry or crumbly- if they do - something has gone wrong!!
Serve simply. These guys don't need extras to make them taste perfect. They are good all by themselves. 
Bon Appetit 
xoxo Renee  

Classic Mojito

The dredges of Summer are here and the last bits of sunshine and later days are dwindling. The gardens are harvesting the last of Summer tomatoes and overgrown mint is holding fast. Thank goodness for that. While we still have some heat left, use that bedraggled overgrown mint to make something good- a mojito!
You can choose to double or triple this recipe if you are having friend's over but this is enough for one.

You will need:

  • 10 mint leaves
  • 2 oz rum blanco (white)
  • 1 lime (juice of)
  • 1 heaping teaspoon turbinado (rough) sugar
  • 1/2 oz simple syrup
  • club soda (this tops the drink so the quanity depends on how much room  is in your glass) 
  • 5 ice cubes 
If you have a shaker as well as a mortar and pestle making this is easy. If not use a pint glass and a wide spoon to create the same effect. 
Take your shaker and put in mint leaves, sugar and lime juice. Use the pestle to grind the mint leaves against the sugar to create a syrupy paste. Add the rum and simple syrup as well as ice and shake to combine. Put mixture (including) ice into desired serving glass and top with club soda to taste. Enjoy!

Monday, August 25, 2014

Roma Tomato and Corn Salsa

This is an easy fix for something fresh that feels like it should be harder to make- it just isn't. To make this salsa you will need:


  • 3 large roma striped tomatoes (yes, you can use regular roma tomatoes but I happened to get a beautiful batch of the striped variety at the local farm stand. 
  • 1/2 of a 15 ounce can of black beans, rinsed 
  • 2 ears of fresh corn 
  • 1 small pepper, minced (I used a purple variety) 
  • 10 leaves of fresh basil
  • 1 teaspoon cumin
  • 3 cloves fresh garlic 
  • 1/2 teaspoon paprika 
  • salt and pepper to taste 
  • olive oil 
  • juice of one lime
Boil a pot of water and blanch the corn (once water has boiled) for 4 min. Take out of the water and let cool. 
Chop garlic tomatoes and pepper and put into medium sized bowl, stir. Add black beans and basil. Cut kernels off corn and add to bowl. Add spices and lime juice along with a drizzle of olive oil plus salt and pepper. Toss and try. Add more spice or salt if needed. Chill and bon appetit. Serve with tortillas and such. 
xoxo Renee

Sunday, August 24, 2014

Strawberry Summer Margarita

I'm not a fan of sugar sweet fruity drinks- however when you want something cold, fruity and balanced with the earthiness of tequila and of course a salted rim, I can cotton to this drink!


  • 2 ounces gold tequila 
  • 1/2 ounce strawberry liquor (I used a strawberry liquor my husband infused from fresh strawberries and lemon peel (so good) but you can use any ol' strawberry liquor 
  • 1/2 ounce triple sec 
  • 1 ounce (typically juice of one) lime 
  • coarse salt
Use the inside of the left over inverted lime (from juicing) and run it over the lip of the glass before dipping it into coarse salt. 
In a shaker put all liquid ingredients over ice, shake, then pour ice and liquid alike into glass. 

Enjoy, 
xoxo Renee

Not So Fancy KALE Chips

My friend Cindy recently said in so many words that even the simple ideas found on blogs can over-whelm those who don't consider themselves "cooks". So together we made something snack-able in my kitchen, that even she said was simple. To make these "chips" you will need the following:


  • one bunch of kale (this works with every variety of kale) 
  • olive oil (you can determine how much you will need depending on your kale) 
  • salt, cayenne, cumin to taste
I know the ingredients seem broad as to how much but just follow the next few steps and you will do fine. 
Preheat your oven to 325. 
Wash your kale and pull out all of the ribs- you must do this if you want your chips to crisp up. If you leave the rib the water content from it will stem the kale instead. 
Thoroughly dry your kale and rip into bite sized pieces. You can drizzle two cookie sheets with olive oil- or- if you have a spray version you can use that. Spread your kale over the sheets without putting them pieces on top of one another, this two will help them crisp. 
Drizzle the top lightly with olive oil and salt, cayenne and cumin. You can certainly change up what kind of spices you put on top! You know how much spice you like so you can use a little or a lot. 
Place in the oven for up to 1/2 hour or until crisp. Don't let these get over-brown thus tasting strong and burnt. When in doubt just try one. 
Bon appetit
xoxo Renee 

Thursday, August 21, 2014

Refreshing Watermelon, Raw Honey and Mint Skinny Smoothie


When I think of smoothies I tend to think of the ones glutted with yogurt and maybe protein powder that seem to make them more of a meal than a drink. My watermelon, honey and mint smoothie is a light and refreshing.
To Make you will need:


  • one cup frozen chunks of watermelon (you prob won't find this in the store so you will have to take the task on of "chunking" and freezing your own
  • 1/2 cup fresh blueberries (you may substitute any seasonal berry) 
  • 1 generous tablespoon of raw honey
  • 10 or so fresh mint leaves
  • 1 cup or so coconut water 
You can add all ingredients to the blender minus the coconut water. Slowly add in the coconut water while blending. You need the addition of the blueberries to give the smoothie girth so you don't end up with watery chunks of watermelon in coconut water so don't skimp out on the berries. 
Enjoy!
-Renee 


Avocado Ranch Dressing

Ok, I kind of cheat on this recipe but for those that like it easy- this is more than easy. You can use a food processor, bullet, or blender.

You will need:


  • one ripe avocado 
  • 2 tablespoons plain greek yogurt 
  • 1/4 cup ranch dressing (I use Drew's buttermilk ranch)
  • teaspoon or so of olive oil, just enough to loosen the mixture 
  • teaspoon of red wine vinegar, again just to loosen 
  • salt and dried oregano to taste 
Put the avocado, yogurt and ranch with spices into the blender- drizzle in oil and vinegar to the mixture to loosen it up into a dressing. If you want to use this for a dip you could skip the oil and vinegar. It would be a great dip for raw cauliflower or carrots etc. 
Bon appetit
xoxo Renee

Wednesday, August 20, 2014

Classic Tomato Sauce with Lamb Sausage and Fresh Herbs

This is a basic sauce that I chose to make in a crock pot so it could slow cook during a 10-hour period of time, however, if you are home and can monitor a pot on low for several hours- that too- is an option.
To make this sauce

You will need:


  • 2 large 32 ounce cans crushed tomatoes (with basil- I like Pastene) (You could also use homemade stewed or peeled tomatoes, it would take several pounds or so of fresh- around 6, stewed, peeled, salted and chopped)
  • one package (5-6) lamb sausage, casing removed 
  • 1 handful fresh parsley
  • 1 handful fresh sage
  • 1 handful fresh thyme 
  • 1 tablespoon dried oregano (dried because it's the most potent- you could use three times the amount for fresh) 
  • 2 back quarters of cheese rinds (I used 1,000 day Gouda- this really makes the sauce rich- aside from all that lamb fat) 
  • 1 large dry chili 
  • one medium yellow onion, minced
  • 5 cloves of garlic, minced 
  • olive oil
In a heavy bottomed pan, put a few tablespoons of olive oil over medium heat and add sausage. Break into pieces and start to brown- add onion and garlic until sausage has thoroughly browned and onion and garlic are translucent. Add oregano and dried chili. Put into a crock pot or keep in pan but reduce heat to low simmer. Add in tomatoes and fresh herbs as well as cheese rind. Cook on stove top up to six hours on extreme low OR in crock pot for up to ten hours on low. 

Top with Manchego (Spanish cheese and fresh basil) Put on top of spaghetti (I use GF spaghetti from Ronzoni - it has a nice blend of brown rice, corn and quinoa) 
Bon appetit 
xoxo Renee